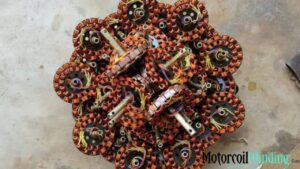
Ceiling fan coil winding is an important process, but if you have basic tools and a little knowledge then, you can learn it at home or shop too.
In this process, you have to wind the stator of the fan, correct wire gauge, number of turns, and winding pitch has to be kept in mind for ceiling fan coil winding. In this process, we wrap copper wire or aluminium wire around the stator core of the fan with a specific number of turns.
For every fan winding, a different wire gauge (like SWG 34, 35, 36) and a specific number of turns (like 450, 500, 550) are used,
which depends on the RPM and power of the fan.
Some essential tools are required for winding, such as:
Enamelled Copper Wire or Aluminum Wire
Winding Machine or Manual Frame (Hand machine)
Multimeter for a continuity check
Insulation Paper (Film Paper)
Soldering Iron & Varnish
If you can do this work, then you are doing it, or are you doing it
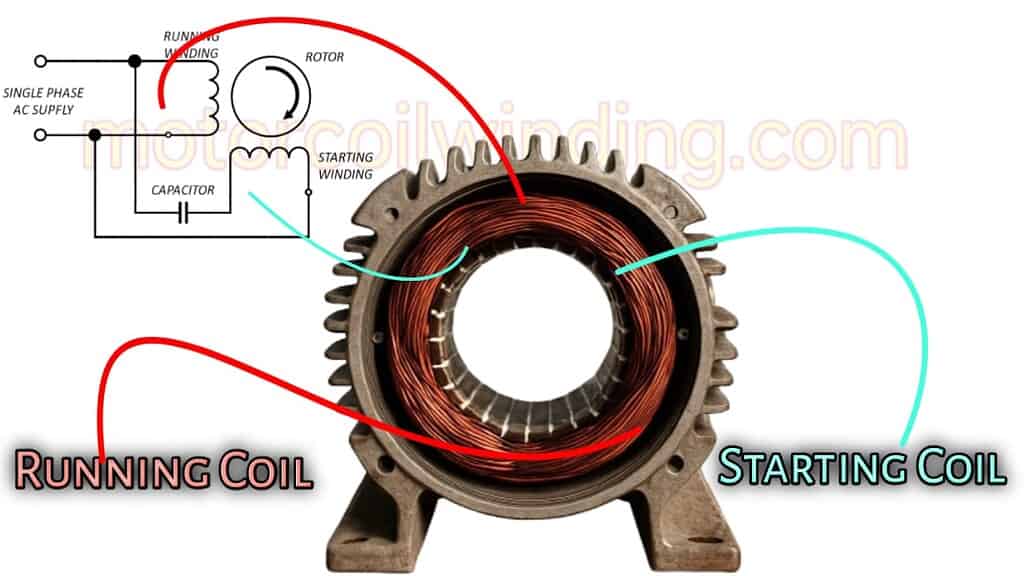
In this process, first the old winding of the fan is removed, then starting coil and running coil are made with new wire. The pitch and turns of both should be exact. After this, the wire terminals are soldered and insulated, and the entire motor winding is varnished and dried.
This work is technical, but if you practice a little and have basic electrical knowledge, you can easily do fan winding at home or in any shop. This guide is specially designed for beginners who want to learn fan winding for their business or home.
Conclusion:
In this guide, we will explain step-by-step how winding is done, which tools are required, and what safety tips should be followed.
This is an easy and practical article for beginners.
Access detailed ceiling fan coil winding data digital tool including SWG, coil pitch, turns & MFD. 100% free tool to search by fan name, slots, SWG & more Guide In today’s rapidly changing times, digital thinking has now come even in technical work like Ceiling Fan Coil Winding Data Digital Tool. Ceiling fan winding is […]
Ceiling Fan Coil Winding 50+ Data Free PDF Includes Download Explore detailed ceiling fan coil winding data, SWG chart, and motor winding process. Download a free PDF with information on turns and slots, _50+ data. Ceiling Fan Motor Coil Winding 50+ Data & Full Guide Ceiling fan motor coil winding is a simple process, which
How does the connection of starting winding and running winding of AC motor work? Know the detailed explanation of capacitor, phase shift. Focus Keywords: What is starting winding What is 50-60Hz Work of running winding Connection of motor winding Role of capacitor in AC motor Phase difference in motor Relation between running and starting
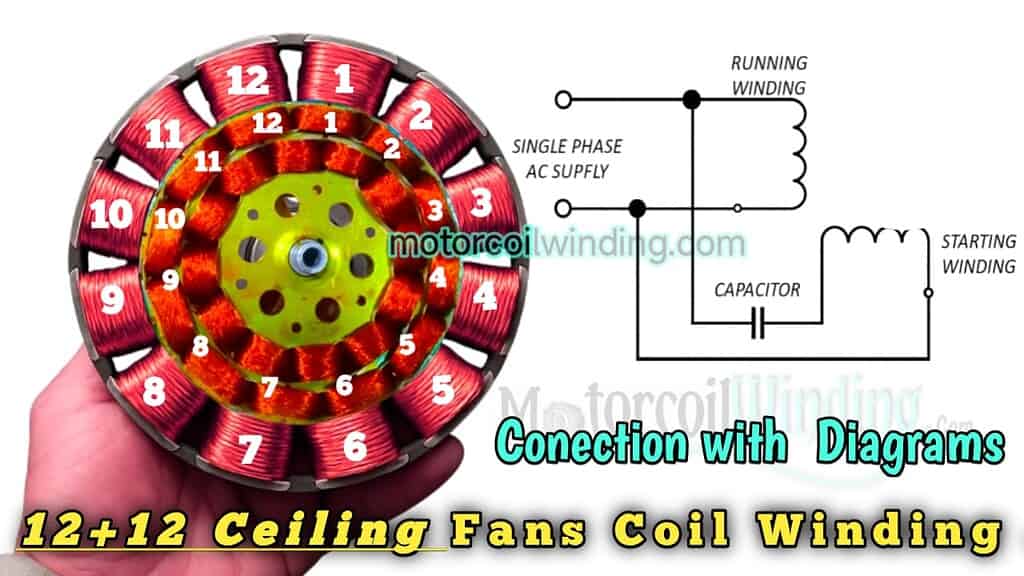
12 Slot Ceiling fan Winding Data Complete Guide Step-by-Step 12-slot ceiling fan winding process, including the turns for running and starting coils, and the wire gauge, step-by-step. Introduction A ceiling fan is an essential part of every home. They come in various sizes, such as 24″, 36″, 48″, and 52″ fans. Today,